


Introduction
I was recently building a social media app as my personal project with ReactJS, and I saw the need to implement the change profile picture functionality. For my backend, I was using Mockbee which is a mock backend service built on top of MirageJs, that let's you mock a backend environment for your front-end apps. In this blog, i'll tell you how you can integrate and leverage the Cloudinary Upload API to upload images to your cloud and reference them later.
Setting-up your Cloudinary account:
Go to cloudinary and create an account for free. It's as simple as ABC.
Once you've logged in, you should be able to see your account details in the Dashboard section. It might look something like this.

Next, go to Settings from the toolbar above.
Switch to the Upload tab in Settings.
Since it's not a production app and we have a limit of the files that can be uploaded with the free account, let us set the automatic backup to Disabled.

- You can toggle around with the default image quality options to suit your needs. I'll just leave it to be automatic.

- Moving on to the most important thing, Upload Preset
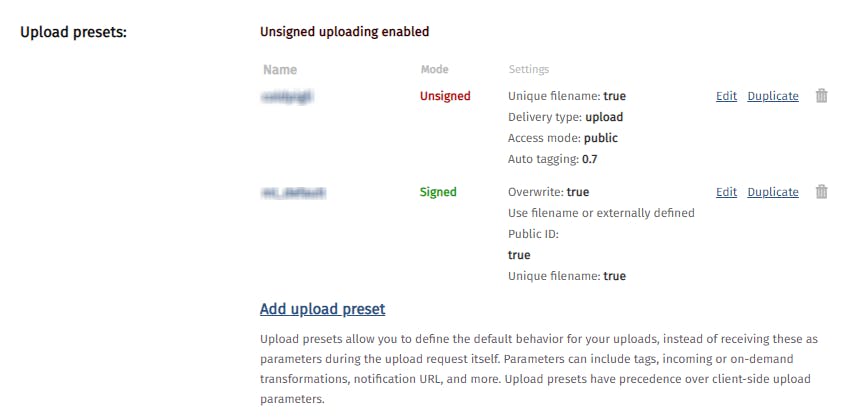
Click on add upload preset, you can use the automatically generated name or if you're really feeling it you can give it a custom name. We're gonna use it later.
Change the mode to unsigned so that you can access via your upload preset.
Okay, we're done with the Cloudinary setup now. Let's now see as to how we can use this to upload images with react.
Setting up your React App.
You can use any existing project, or else spin up a new react project. The only thing you need to do is to setup environment variables to be able to use cloudinary.
- Create a .env file in the root of your directory. Note: Please ensure that your .env file is indeed in the root of your project.
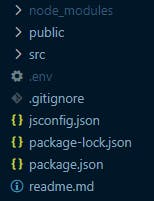
- Create an environment variable inside the .env file. Make sure the name starts with REACT_APP_YOUR_VARIABLE_NAME.
The value of the variable should be the upload preset that you had earlier created.
REACT_APP_CLOUDINARY_API_KEY=your_upload_preset
Uploading the Image.
Now that we are done with the setup for both cloudinary and your app, we are all set to delve into the code.

- Set up the input element
<input type="file" id="myfile" name="myfile" accept="image/*" />
The input type should be file and the accept attribute set to "image/*"
- Adding an onChange listener
<input type="file" id="myfile" name="myfile" accept="image/*" onChange= {(e) => uploadImage(e.target.files[0])}/>
- Let's create the upload image function now. As you can see we are passing e.target.files[0] as the argument to the uploadImage function. All element nodes have a files attribute of type FileList on them which allows access to the items in this list and thus e.target.files[0] fetches the first file in the node's file list as a File object.
Creating the uploadImage function
- Checking the size of the image being uploaded
 const uploadImage = async (image) => {
    setUploadingImage('Uploading Image');
    if (Math.round(image.size / 1024000) > 3){
      setUploadingImage('Image size cannot exceed 3mb');
            console.log("Image cannot exceed 3mb");
    }else{
      //upload Image
  }
}
Huge image sizes take a longer time to upload and hence it is advisable to check the size of the image being uploaded. Since the image is an object, you can tap into it's size property. The division by "1024000" only converts the size into mega-bytes. For performant reasons, we are limiting the user to only upload the image if it's size is less than 3mb.
- Creating the formData object
The FormData object lets you compile a set of key/value pairs to send using XMLHttpRequest. When you make a POST request, you have to encode the data that forms the body of the request in some way. We should use multipart/form-data (a type of encoding ) when form includes any elements. Form Data helps in this encoding
const uploadImage = async (image) => {
    setUploadingImage('Uploading Image');
    if (Math.round(image.size / 1024000) > 3){
      setUploadingImage('Image size cannot exceed 3mb');
            console.log("Image cannot exceed 3mb");
    }else{
            const uploadData = new FormData();
            uploadData.append("file", image);
            uploadData.append("upload_preset", process.env.REACT_APP_CLOUDINARY_API_KEY);
            const requestOptions = {
                method: "POST",
                body: uploadData,
            };
  }
}
Setting the requestOptions: the method as POST and the body as the uploadData object.
- Making the fetch call
const uploadImage = async (image) => {
    setUploadingImage('Uploading Image');
    if (Math.round(image.size / 1024000) > 3){
      setUploadingImage('Image size cannot exceed 3mb');
            console.log("Image cannot exceed 3mb");
    }else{
            const uploadData = new FormData();
            uploadData.append("file", image);
            uploadData.append("upload_preset", process.env.REACT_APP_CLOUDINARY_API_KEY);
            const requestOptions = {
                method: "POST",
                body: uploadData,
            };
          await fetch(
                "https://api.cloudinary.com/v1_1/your_cloud_name/image/upload",
                requestOptions
            )
                .then((response) => response.json())
                .then((json) => {
                    console.log(json);
                })
                .catch((error) => {
                    console.error(error);
                });
  }
}
- As you can see you need to make a fetch call to the following url
https://api.cloudinary.com/v1_1/your_cloud_name/image/upload
You can find you cloudinary cloud name in the dashboard of your cloudinary account.
The response we get is an object which contains the imageUrl of the uploaded image. You can now use this imageUrl to use in your react app. You can also see your image in the Media Library section on the Cloudinary Dashboard
Conclusion
I hope this blog helps people who want to use cloudinary to save their images. Further we can integrate the ReactSDK for cloudinary and we can then apply transformation to your images too. But that's a topic for the next blog. Until next time.